Ever found yourself juggling your phone while riding, trying to follow maps, missing turns, and thinking “There has to be a better way”?
Yeah. Not ideal. And honestly? Pretty risky too.
Thankfully, your Ola Electric S1 Pro has your back. It’s not just a scooter — it’s a smart ride. With a built-in GPS navigation system, you no longer need to awkwardly mount your phone or take dangerous glances while zipping through traffic.
But if you’re not sure how to turn on the GPS on your Ola S1 Pro, don’t worry — I’ve got you.
Let me walk you through it, step by step — without jargon, without tech confusion, and definitely without assumptions. Just clear, real help.
What is the GPS Feature?
Before we switch it on, let’s talk about what it does.
The built-in GPS (Global Positioning System) in your Ola scooter uses satellite signals to detect your scooter’s real-time location.
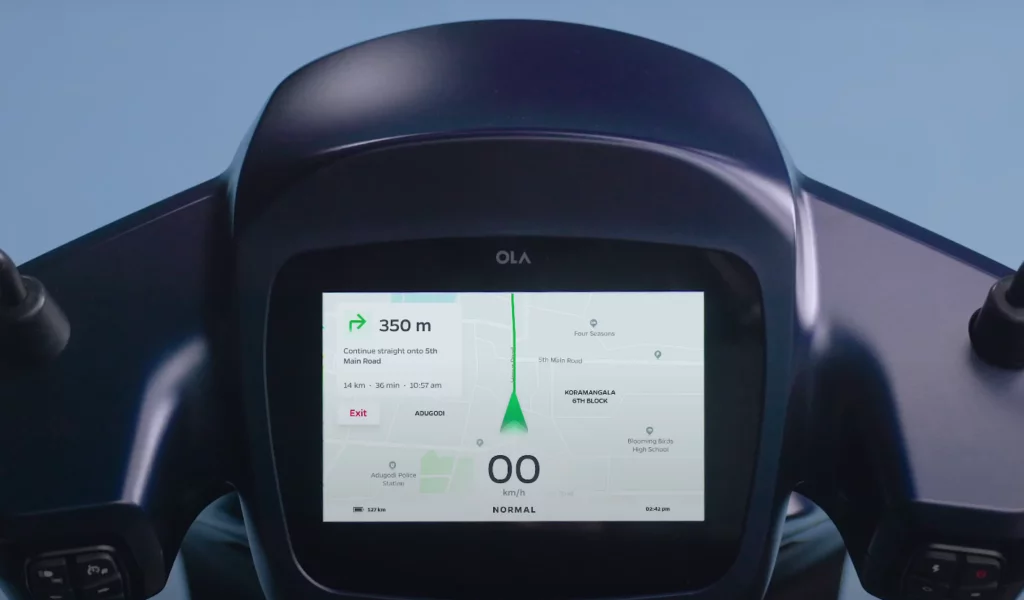
This allows you to access live turn-by-turn directions, just like you would on Google Maps — except it’s directly integrated into your scooter’s dashboard.
No third-party app, no awkward phone holder, no distractions. Just clear directions on your built-in touchscreen.
And yes — it works even in the middle of nowhere. (Well, almost.)
Activate GPS in Your OLA Electric S1
1. Open the Settings Menu
Head over to your scooter’s main display and look for the settings icon — that little gear-shaped symbol (yep, like the one you tap on your phone).
Press it to access the main configuration area of your scooter’s system.
Tip from my own confusion once: The settings icon doesn’t always jump out — it’s subtle. Give the screen a second if you’ve just started the scooter.
2. Locate the GPS Option
Once you’re inside the settings, scroll until you see something like “Navigation” or “GPS Settings.”
This is your control hub for all things navigation-related — kind of like the command center for your ride’s inner compass.

3. Enable GPS
Tap on the GPS toggle to turn it on. You’ll usually see a checkmark or a switch icon change color — a visual confirmation that the feature is now live.
If the toggle doesn’t respond, your software might need an update. I’ve seen that happen post-firmware refresh. More on troubleshooting below.
4. Setting Up Your Preferences
This is where you can personalize things:
- Route Preferences: Avoid highways or toll roads? Choose your vibe.
- Map Display: Day/Night mode, 3D vs 2D — your call.
- Voice Guidance: Volume levels, language, male/female voice — tweak it all.
Think of it like setting up your playlist or adjusting your car’s mirrors. Make it feel right.
5. Confirm Activation.
After enabling and adjusting preferences, exit the settings menu by pressing the “X” on the top corner.
You should now see a small GPS icon on your dashboard — usually near the top corner. That’s your green light.

6. Test the GPS Feature.
Still unsure if it’s working? Let’s check.
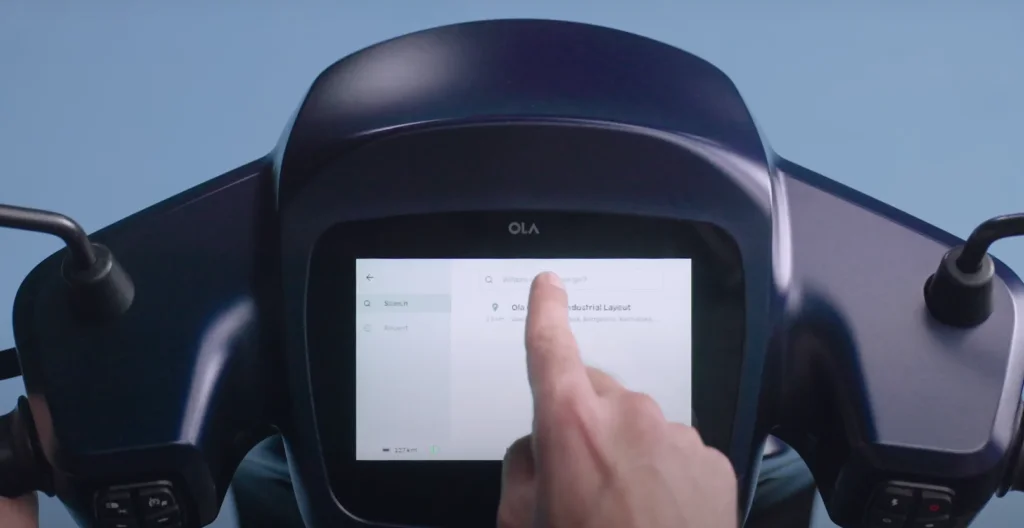
Just tap on the search bar in the navigation section and type in any location — a cafe, a park, or your friend’s place.
Once entered, your Ola S1 Pro should start showing real-time directions on the screen — complete with a moving map, estimated time of arrival, and route overview.
Yes, your scooter just became your personal navigator..
7. Troubleshooting
Sometimes things get fussy. If the GPS feature isn’t working as expected, here’s a quick checklist:
- Satellite Signal Issues: Are you parked indoors or under heavy trees? Step into open sky for better reception.
- Software Bugs: Check for pending software updates in your settings menu.
- Incorrect Time/Date Settings: GPS syncs with time zones. If the time’s off, location tracking might be too.
- Connectivity Glitches: Reboot your scooter — a simple restart often does wonders.
Still not fixed? Reach out to Ola Customer Support or visit your nearest Ola Experience Centre. They’re usually quick with diagnostics.
Final Thoughts
The GPS on your Ola S1 Pro isn’t just a flashy feature — it’s a game-changer for urban commuting. Whether you’re dodging traffic, exploring new routes, or just trying to make it to work on time, having smart navigation built right into your ride is a massive win.
And the best part? You don’t need to mount a phone, drain its battery, or squint at a tiny screen.
I genuinely love how Ola’s interface feels intuitive once you get the hang of it. I remember my first long ride — GPS guiding me through unfamiliar roads like a digital co-pilot. Smooth. Reliable. Zero stress.
So go ahead — activate that GPS, hit the road, and trust your scooter to show you the way.


